


In desert and river-adjacent communities, water losses often cluster around predictable disruption periods: wind-driven rain that finds weak seals, HVAC condensation during heavy cooling seasons, and tenant turnovers when a small leak can go unnoticed in a vacant unit. When schedules are tight, it’s tempting to treat “equipment is gone” as the finish line.
A final inspection is what protects you from secondary damage that shows up later: re-wetting behind finishes, lingering moisture in cavities, hidden mold risk, odor absorption, warped materials, corrosion, and premature coating or flooring failures.
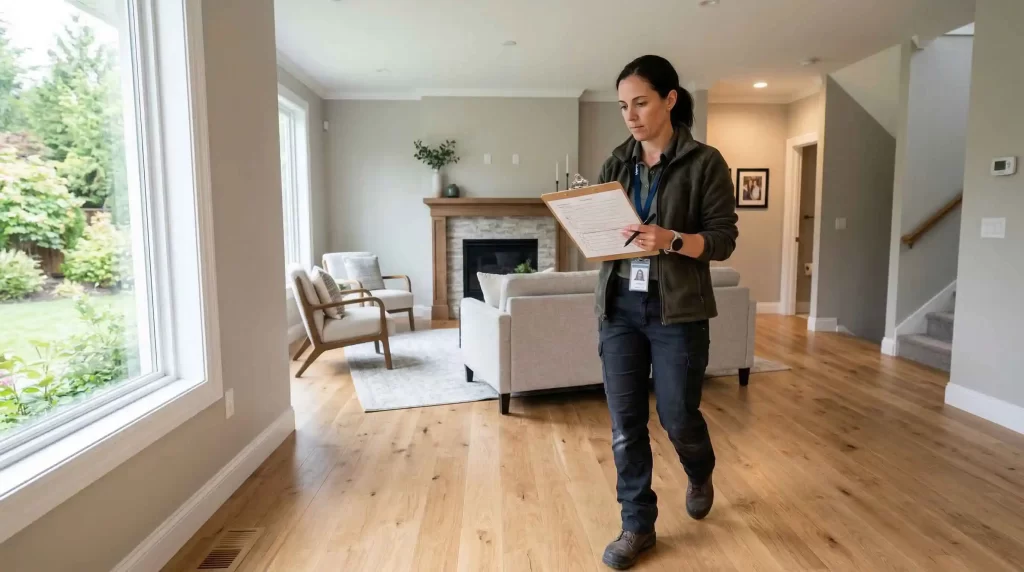
Homeowners want confidence before moving back in. Business owners want a predictable reopening. Property managers want fewer callbacks and cleaner documentation for stakeholders.
This checklist is built to help you verify that a water damage restoration job is truly complete, not just visually improved.
What “final inspection” should confirm
A strong final inspection answers five practical questions:
- Is the moisture actually back to normal?
- Did repairs and finishes restore function and appearance?
- Are there remaining odors, residues, or contamination concerns?
- Do building systems operate normally again?
- Is the documentation complete for ownership, management, or insurance?
The faster you confirm these items, the less likely you are to deal with repeat damage. For context, the EPA uses a 24 to 48-hour response benchmark as part of mold-prevention decision-making after water intrusion, which reinforces how quickly conditions can change if moisture remains trapped.
Step 1: Safety and access check before you start the walkthrough
Before you begin any inspection, take a minute for safety basics:
- Confirm power is stable in affected areas and avoid touching wet electrical components. If anything looks questionable, pause and call qualified help.
- Confirm walkways are clear of trip hazards (transition strips, tack strips, exposed fasteners, uneven subfloor).
- If the loss involved potentially contaminated water, avoid disturbing any remaining residue and consult qualified professionals.
This step is quick, but it prevents injuries and bad decisions made under pressure.
Step 2: Moisture verification, not guesswork
A surface can feel dry while moisture remains inside drywall, subfloors, and cabinetry. Final inspection should include moisture confirmation in the most likely “holdout” zones:
High-risk zones to test or verify
- Behind baseboards and lower wall sections
- Under floating floors or laminate edges
- Around cabinets, toe kicks, and vanities
- Around windows, doors, and exterior wall penetrations
- Closets and low-airflow corners
- Utility areas around appliances and supply lines
What you want to see
- Drying is consistent across the footprint of the original wet area, including edges.
- No “cold spots” that suggest lingering dampness.
- No re-wetting signs since equipment removal.
If your project involved professional water damage restoration, moisture verification should be part of the normal closeout because it directly reduces the risk of secondary damage.
If you need help with a current loss, we offer 24/7 Emergency Response and are available around the clock for water damage restoration.
Step 3: Visual repair and finish quality check
A final walkthrough should verify that repairs hold up under normal use, not just in photos.
Walls and ceilings
- No staining, bubbling paint, nail pops, or seam telegraphing
- Straight lines at trim and corners
- Texture and paint blend appropriately
Floors
- No soft spots, buckling, curling edges, or hollow sounds
- Transitions are secure and safe
- No recurring discoloration at seams or under rugs
Cabinets and built-ins
- Doors and drawers open smoothly
- Toe kicks are secure
- No swelling at base panels or shelving
Hardware and fixtures
- Properly seated and stable
- Caulk lines clean where appropriate
- No seepage around supply lines
If something fails this step, treat it as a signal to investigate moisture again, not just a cosmetic issue.
Step 4: Odor, residue, and cleanliness verification
Odors and residues are often what property owners notice first after “restoration is complete.” Final inspection should include:
- A slow walk through each affected room with doors closed briefly, then reopened
- Checking soft goods and porous areas for musty or sour odors
- Looking for tacky residue on walls, trim, and hard surfaces
- Confirming that dust from demolition or drying did not settle into vents, returns, or closets
If the loss involved dirty water or a backup, sanitization and controlled cleanup matter even more, and the final inspection should confirm the space is not being handed back with lingering contamination concerns.
Step 5: Building systems and operational checks
Water can interrupt systems that do not look “wet” from the outside.
Plumbing
- Confirm fixtures run normally
- Look for slow drips at shutoffs, supply lines, and appliance hookups
- Monitor for any pressure changes or unexplained dampness
HVAC and ventilation
- Confirm airflow is normal in affected areas
- Note any new odors when the system cycles on
- Check that condensate lines and drain pans are not contributing to re-wetting
Electrical (visual only unless you are qualified)
- Test common switches and outlets if safe and previously verified
- Watch for flicker, heat, or unusual smells and stop if present
Step 6: Documentation you should request or keep
Documentation protects property owners and managers long after repairs are complete. A final packet should include:
- Before and after photos
- Notes on affected areas and what was removed or replaced
- Drying and verification notes, if available
- Any care instructions for repaired or cleaned materials
- A clear “what to watch” list for the next 2 to 4 weeks
If you are coordinating with insurance, avoid assumptions. Coverage and requirements vary widely, so confirm specifics with the carrier or adjuster.
Step 7: A short post-restoration monitoring plan
Even a well-run job benefits from a simple follow-up plan:
- Re-check the most affected zones weekly for the first month
- Watch for musty odor, recurring stains, and flooring movement
- Pay attention after weather shifts, HVAC load changes, and occupancy changes
- Act quickly if anything reappears
That EPA 24 to 48 hour benchmark is a useful reminder here too: if a new wetting event occurs, fast action helps reduce the likelihood of secondary damage and microbial problems.
When you want the final walkthrough to be part of the process
A reliable restoration partner does more than dry and leave. The closeout should help you feel confident that moisture is controlled, finishes hold up, and the space is ready for normal use.
We are Semper Fi, Veteran-owned and operated services, and Licensed Contractor – ROC# 349271. We also provide 24/7 emergency water damage restoration for urgent situations. If you need help after a leak or flood.
Frequently Asked Questions
1) What is the purpose of a final inspection after water damage restoration?
It confirms the job is complete beyond appearances. The goal is to verify drying, repairs, cleanliness, and system operation so you reduce the chance of re-wetting, odor return, or hidden moisture problems that can trigger costly rework later.
2) How can I tell if materials are truly dry?
“Dry to the touch” is not reliable for wall cavities, subfloors, and cabinets. A strong closeout includes moisture verification in high-risk zones like behind baseboards and under flooring edges. If moisture remains, secondary damage risk increases.
3) What areas are most likely to hide lingering moisture?
Common holdout areas include lower wall sections, insulation behind drywall, cabinet toe kicks, under floating floors, closets with low airflow, and around windows or exterior penetrations. These zones should be checked carefully during the walkthrough.
4) Why do odors sometimes appear after equipment is removed?
Odors can be trapped in porous materials or return if moisture rebounds in hidden spaces. The final inspection should include an odor check with doors closed briefly, plus a residue and cleanliness check on trim, walls, and flooring seams.
5) Should I be concerned if the paint looks fine but the wall feels cool?
Possibly. Cooler sections can signal higher moisture or poor airflow behind finishes. Treat it as a reason to verify moisture, not just aesthetics. If you suspect hidden dampness, consult qualified professionals for evaluation.
6) What should I do if floors start to cup, buckle, or separate after restoration?
Stop and document the change with photos. Flooring movement can indicate moisture rebound, installation issues, or material stress. A prompt inspection can help prevent more extensive damage and reduce the need for larger tear-out later.
7) Does a final inspection include HVAC and plumbing checks?
It should include basic operational checks. Confirm fixtures run normally and look for drips at supply lines. For HVAC, confirm airflow is normal and note any new odors when the system runs. Call qualified professionals for technical diagnostics.
8) What documentation should I keep after restoration is complete?
Keep before and after photos, notes on affected areas, what was removed or rebuilt, and any drying or verification notes if available. For managed properties, also keep a simple monitoring plan for the next few weeks.
9) How soon should I act if I notice re-wetting or a new leak?
Act quickly. The EPA uses a 24 to 48-hour response benchmark as part of mold-prevention decision-making after water intrusion, which is why early action matters if a new wetting event happens.
10) What if the original loss involved a backup or possibly contaminated water?
Treat it with extra caution. Avoid disturbing residues and consult qualified professionals. A final inspection should confirm that cleaning and sanitization steps were appropriate for the source and that the space is not being returned with contamination concerns.
11) Do you offer emergency help for new water damage that needs fast mitigation?
Yes. Our water damage restoration services are available around the clock with 24/7 emergency response. Call Now – (928) 504-6179 for immediate assistance.
12) How can I schedule service or reach you for next steps?
Call Now – (928) 504-6179 if you need to explain the situation before scheduling.